When we edit a video, we often want to make the different scenes smoothly between separate video clips and/or photos. Transition can make it!
GoPlay Editor offers a wide range of transitions for video editing, so you’ll be sure to find the right ones for your movie. Use the popular video transition effect, or more transitions like Circle, Warp, or Ripple. You can really get creative with GoPlay Editor!
1. Install GoPlay Editor
Install GoPlay Editor and start adding transitions right away.
2. Choose Videos You Want to Apply Transitions
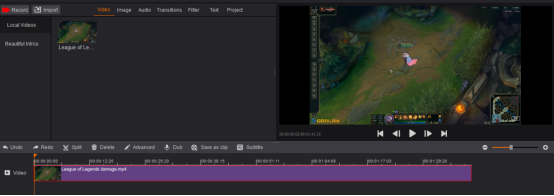
Launch GoPlay Editor, select “Video Editor” and click “Import” or “Image” to import the videos/images. Then they will be shown in “Video” or “Image”. Click “+” to add these videos/images into timeline. Videos/images will be automatically added on the timeline. You can also simply drag and drop the videos/images on the timeline.

3. Insert Video Transitions to Your Videos
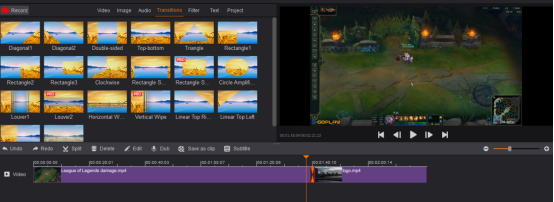
Now click “Transitions” to see the list of available film transitions. GoPlay Editor offers many transition styles including Louver, Crossfade, Vertical Wipe, Fade and many others. Select one transition style and then drag it to any place between two videos or video/image on the video track. When the red circle with slash on the upper left corner of the transition disappears, it means the transition is placeable.

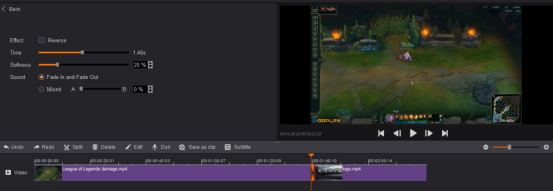
You could click the added transition in the timeline, and then click “Edit” to make some settings of the transition, such as adjusting the effect, time, softness and sound.

4. Export Edited Video
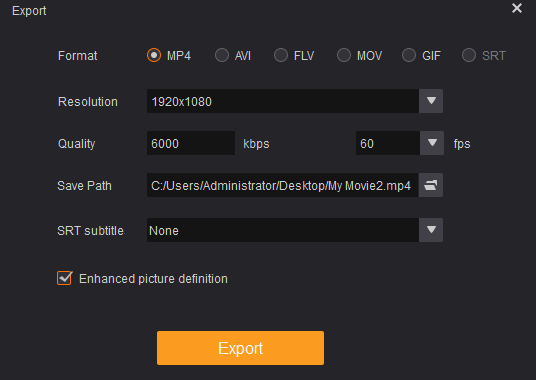
When everything is ready, click “Export” and choose the appropriate option for what you want to do with the video. Select “Save Path” to save the video in your favorite path and specify the filename. Finally, click “Export”. You can also upload your video directly to YouTube – to do this, click “Upload”. But you need to log in your YouTube account first.


